Section Optimiser
The Section Optimiser sizes steel beams from lists of sections. It analyses the model, checks every beam with every section of its list to EN 1993-1-1 on the forces the beam carried, as Utilisation does, puts each beam on the first section of its list that keeps it at or below MaxUtilisation, and analyses again: the new sections change the self-weight and, in a statically indeterminate structure, where the forces go. It stops when no section changes, or after Iterations analyses.
🔧 Grasshopper component
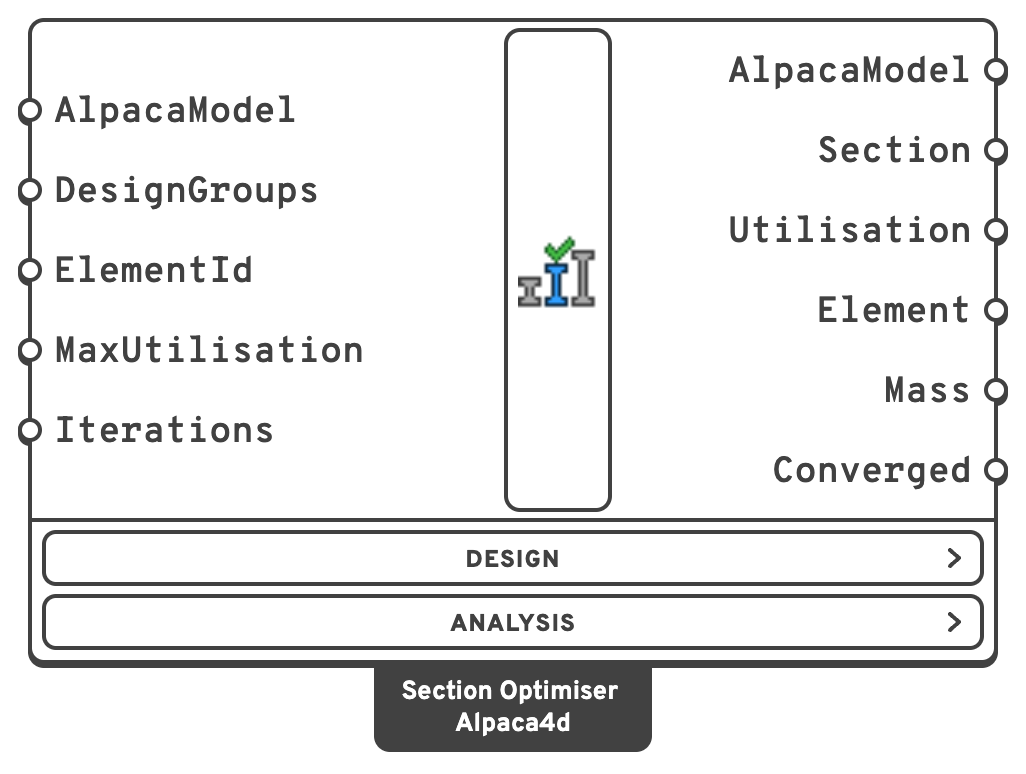
AlpacaModelThe assembled model, from Assemble.
DesignGroupsWhich beams to size from which sections: one Design Group per list.
ElementIdOptimise only some of the beams: an ElementId (MyBeam_3), a wildcard (MyBeam*, Col_?), an element tag (47) or a regular expression (regex:^Col), mixed freely.
1 is exactly at the limit, 0.8 keeps a fifth in hand.IterationsHow many analyses at most.
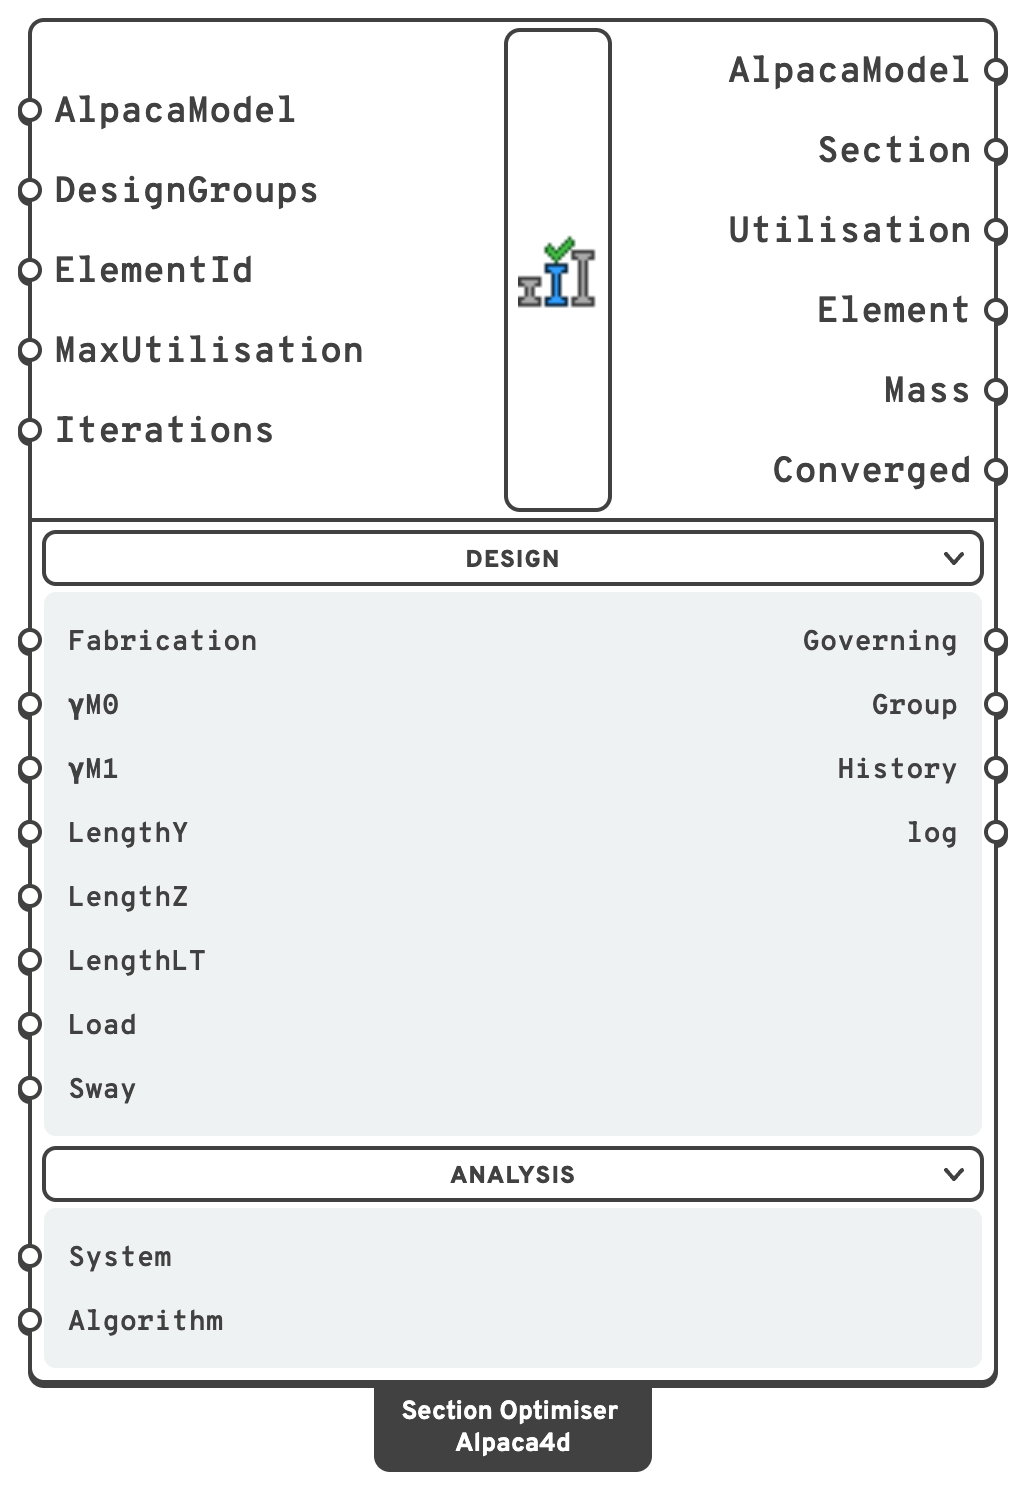
FabricationHow the sections are made, which sets the buckling curves: Rolled (rolled I-sections, hot-finished hollow sections) or Welded (welded I-sections, cold-formed hollow sections).
γM0Partial factor for the resistance of cross-sections.
γM1Partial factor for the resistance of members to instability.
LengthYBuckling length about local y, the minor axis of an I, in m.
LengthZBuckling length about local z, the major axis of an I, in m.
LengthLTDistance between lateral restraints, for lateral-torsional buckling, in m, as in Utilisation.
LoadWhere the load along each beam acts on its section, for lateral-torsional buckling: ShearCentre, Destabilising (or Top) or Stabilising (or Bottom).
SwayThe beam belongs to a frame that buckles by swaying: Cm = 0.9 about both axes (Table B.3).
SystemHow the system of equations is solved, as in Analysis Settings: Mumps on every core when the OpenSees has it, BandSPD when not.
UmfPack if a model refuses to solve. In the Analysis menu.AlgorithmHow each analysis is iterated to equilibrium.
Linear does one solve with no iteration: a little faster on an elastic model, and only right on one. In the Analysis menu.AlpacaModelThe last design, analysed: for Utilisation, Beam Forces or Model View, or for Natural Vibration or Linear Buckling.
UtilisationEach beam's utilisation in the last design, as Utilisation's Max.
kg, the last being the last design's.true when the last iteration changed nothing: every beam taking part has the first section of its list that works for it.GoverningWhich check gives each beam's utilisation, or why there is none.
GroupEach beam's design group, by name, or its family (HEA family) for a beam in no group; empty for a beam that takes no part.
HistoryOne item per iteration: mass, largest utilisation, beams above MaxUtilisation, sections changed, and how long the analysis and the checks took.
logWhat OpenSees printed in the last iteration.
A beam's list is its Design Group's, in the order given. A beam in no group is sized within the family of the section it starts with in Steel Section Library, smallest area first: an HEA200 among the HEAs, a CHS among the CHS. A section that is not from the library has no family, and keeps its place.
The Design menu holds how the members are made and held, set once and left alone, and the outputs about each beam's check; the Analysis menu, how each analysis is solved. Each analysis is static, in one step. Press Escape to stop after the iteration under way.
📈 When to use it
Use it when
- You want the lightest sections of a steel frame, truss or beam grid that pass EN 1993-1-1 under its loads, and the forces depend on the sections themselves.
- A member drawn as several beams must end up with one section: give it a Design Group of its own.
Do not use it when
- The members are not steel: the check, and so the sizing, is steel only.
- You want to compare a few designs side by side: Explorer Inputs steps through them and records each.
The Two-Span Beam example sizes a curved beam over two spans from a list of HEAs, element by element and as one section.
Note
A beam can move back up its list as well as down it. When a design comes round again, the iterations after it only let beams move on down their lists, so the run ends.